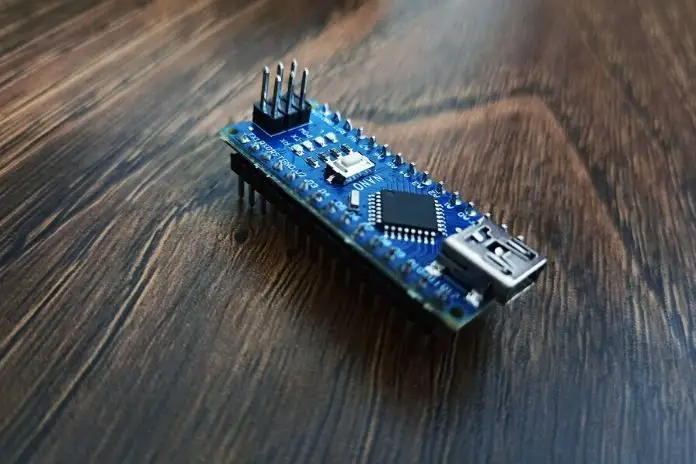
One of the trending technologies used in robotics projects related to electronics and any embedded systems is the Arduino Nano. This is an Atmega328p or Atmega168 based microcontroller board designed to offer essential automation features or properties.
First released for students to use various projects involving electronics and automation, it has skyrocketed because it was also used by people without any technical background. Since the breakthrough of the smart people out there, providing a way to power Arduino Nano using batteries, the board has become very much simplified.
How to power Arduino Nano with battery? Arduino Nano is built to have an operating voltage measured as five volts, but it has an input voltage that varies seven to twelve volts. This board is also engineered to receive input voltage with its VIN pin.
If you want to power it using a battery, you have to connect the battery using its VIN pin and G pin. The positive terminal of the battery is connected with the vin, and the negative is connected with the G pin, which stands for Ground.
It is originally built to be powered by a mini-B USB connected to a six to twenty-volt external power supply using the pin 30 or to a five-volt regulated power supply with the pin 27.
You can power the Nano with a nine-volt battery, and you can also use alkaline and LiPo cells, provided that you will meet the seven to twelve volts input that it requires.
In this guide, I am going to tackle everything that you need to know about the Arduino Nano and anything related to it. I will also provide you a step by step guide on how to use batteries to power the said microcontroller.
Along with this information, I am also going to impart some insights with regards to the Nano in our goal to help you clarify some of the questions you may have about the device.
Step by Step Guide on Powering the Arduino Nano with Batteries
In this part, I am going to walk you through the steps that you have to follow if you want to power your Arduino Nano with batteries. Keep in mind that the voltage input of the board is seven to twelve volts. Using a power cell with lower than seven volts will not work.
As I mentioned earlier, you can use alkaline and LiPo cells to power the board as long as the input will be within the seven to twelve range.
Step1: Preparing the Materials You Need
Before you can power your Arduino Nano microcontroller with batteries, the first thing you have to do is to make sure that you have all the materials you need. Make sure that the power cell you will be using is within the input voltage requirement of the board. It has to be seven volts or higher but not more than twelve volts.
If you are using alkaline batteries, you have to make sure that you have a battery holder. You also need to have small wires for making the connection. You may also need electrical tape to make sure that wires will stay in place.
Step2: Preparing the Wires for the Connection to be Made
The next thing you have to do is to strip the end of the wires that you will be using for the connection. Stripping both ends of the wires is a step to expose the small copper wires that are essential for energy transfer.
Strip one end about an inch long for the battery connection. Keep in mind that to have a smooth and efficient transfer of energy, the copper wires are twisted to form a single unit.
Step3: Making the Connection Between the Board and the Battery
Take one of the wires and then connect it with the positive terminal of the battery, and then do the same with the other wire and the negative terminal. Then take a look at the board and locate the VIN pin and G pin. Take the other end of the wire connected to the battery’s positive terminal and connect it with the VIN pin.
You can use electrical tape to hold the wire on the board firmly. After that, take the other end of the wire for the negative terminal and then connect it with the G pin on the board. Use a bit of electric tape to hold it in position.
There you go! You have now successfully powered your Arduino Nano using batteries. It can also be done with a switch by adding one element on the definite link. With these steps, you can use a nine-volt battery or three alkaline AAA batteries, but you have to make sure the AAA batteries are connected in series.
The Complete Specifications of the Arduino Nano and Its Pinouts
Arduino Nano is one of the latest Arduino boards released. It is a breadboard-friendly and flexible microcontroller based on ATmega328p and ATmega168 chips.
It is engineered to have a pinout that contains six pins for power, two pins for reset, eight analog, and fourteen digital. Each of the digital and analog pins of the board is designed for inputs and outputs, but they are also assigned to have multiple functions.
The digital pins can operate in various modes as controlled by pinMode() and the digitalWrite() functions. The analogRead() function controls the operation of the analog pins of the board. Nano’s analog pins are designed to have ten bits resolution in total, where its value is measured from zero to five volts.
The Nano is also built to have a crystal oscillator with a sixteen megahertz frequency. This oscillator is used to generate a clock of the precise and accurate frequency with the use of constant voltage.
Arduino Nano’s Description of Pins
To have a better understanding of the Nano’s pinouts, I thought that it would be best if we understood the description of its pins. In this part, I am going to take a closer look at each of the pins of the Arduino Nano. I will also provide you the information on those pins, what are each of them for, and their individual functions.
● VIN Pin – The first Pin I’ve mentioned earlier is the VIN pin. This Pin is designed to receive the power input for the device when an external power source is used.
● 5V Pin – Next, Pin is the 5V Pin. This is the board’s regulated power source designed to power all the components on the board, including its controller.
● 3.3V Pin – The 3.3V Pin on the board is the minimum generated voltage produced by the board’s voltage regulator.
● GND Pin – There are two GRD pins on the board. These are ground pins on the board that can be used as the ground connection when needed. Like when powering the Nano with a battery, however, in that case, it is used as a negative terminal.
● Reset Pin – As the name suggests, these reset pins are used for resetting the board. It is instrumental when the programs running becomes too complex for the board. Having low voltage on these pins will also reset the Nano.
● Analog Pins – As I mentioned earlier, the Nano has eight analog pins. These pins are labeled from A0 to A7, and these pins are designed for measuring the analog voltage with a range of zero to five volts.
● RX & TX Pins – The RDX and TXD pins are designed to be used on serial communications. The Tx stands for data transmission, and the Rx is for data receiving.
● 13 Pin – The digital pin 13 is designed for turning on the board’s built-in LED light.
● AREF Pin – It is also designed to be a reference for the input voltage.
● PWM Pin – The six of the digital pins, pin 3, pin 5, pin 6, pin 9, pin 10, and pin 11, are designed for the 8-pit Pulse Width Modulation (PWM) output. This is a method that is used for picking up analog results with the use of digital sources.
● SPI Pin – The Serial Peripheral Interface pins; pin 10(SS), pin 11(MOSI), pin 12(MISO), and pin 13(SCK), are designed for the transfer of data among the microcontrollers as well as peripherals.
● External Interrupts Pins – These are the pins 2 and 3 that are used as external interrupts, which is useful for emergencies. They are used if the main program has to be stopped or if it needs to call a significant instruction. Once the instruction is carried out, the main program running on the board will resume.
● I2C Pin – The I2C pins; A4 and A5 are designed for communications where the A4 is responsible for the serial data line (SDA), and the A5 is for serial clock line (SCL). They are used for the synchronization of data on the I2C bus.
There! Those are all the pins of the Arduino Nano and their functions. Having knowledge of this will allow you to understand how the Nano works, and it will also give you an idea of how you can efficiently use the microcontroller.


